It had originally been our plan to play a mega-game representing Shiloh in August using Johnny Reb III and the excellent "This Bloody Field" scenario book. All the plans were in place for 14 players when we had to make the regrettable decision to post-pone. Putting all of us in a confined building for a weekend was not smart in a COVID-19 world.
But to put all the prep and training games to no use also seemed unwise. So we cut attendance and tables in half, opened up my well-circulated garage and played an alternative non-historical game.
The Union was the Army of the Ohio based out of Fort Mitchell. They heard reports of Confederate troops marching north and west towards Cincinnati. They sent a small force up the road to Cincinnati then southward to create a line to slow or halt the Confederates. The remainder of and bulk of the forces in Fort Mitchell pursued eastward towards the direction where the rebels were reported.
The Confederate forces were the Army of Kentucky, pushing northwards towards Cincinnati to try to severe the ties east and west along the Ohio River. Trying to skate around the fort, they were met with terrible weather conditions which ground movement to a screeching halt. After two days of little to no progress, the weather subsided. Not to lose the advantage, a vanguard force pushed forward to take the town of Covington, to use as a place to push men and supplies north to Cincinnati. Both sides were equal, with the Union having one more general present. All arms were used with elite, regular and green troops on table.
 |
The tables. Troops starting on Table A want to move
to Table B. |
 |
Table A - both side move on from corners, needing to reach the
"Y" intersection. |
 |
Similarly on Table B both sides start out of contact.
|
 |
The race is on. Note the Confederate cavalry at the bottom of the image.
|
 |
Table B - coming to grips. Put your mask back on!
|
 |
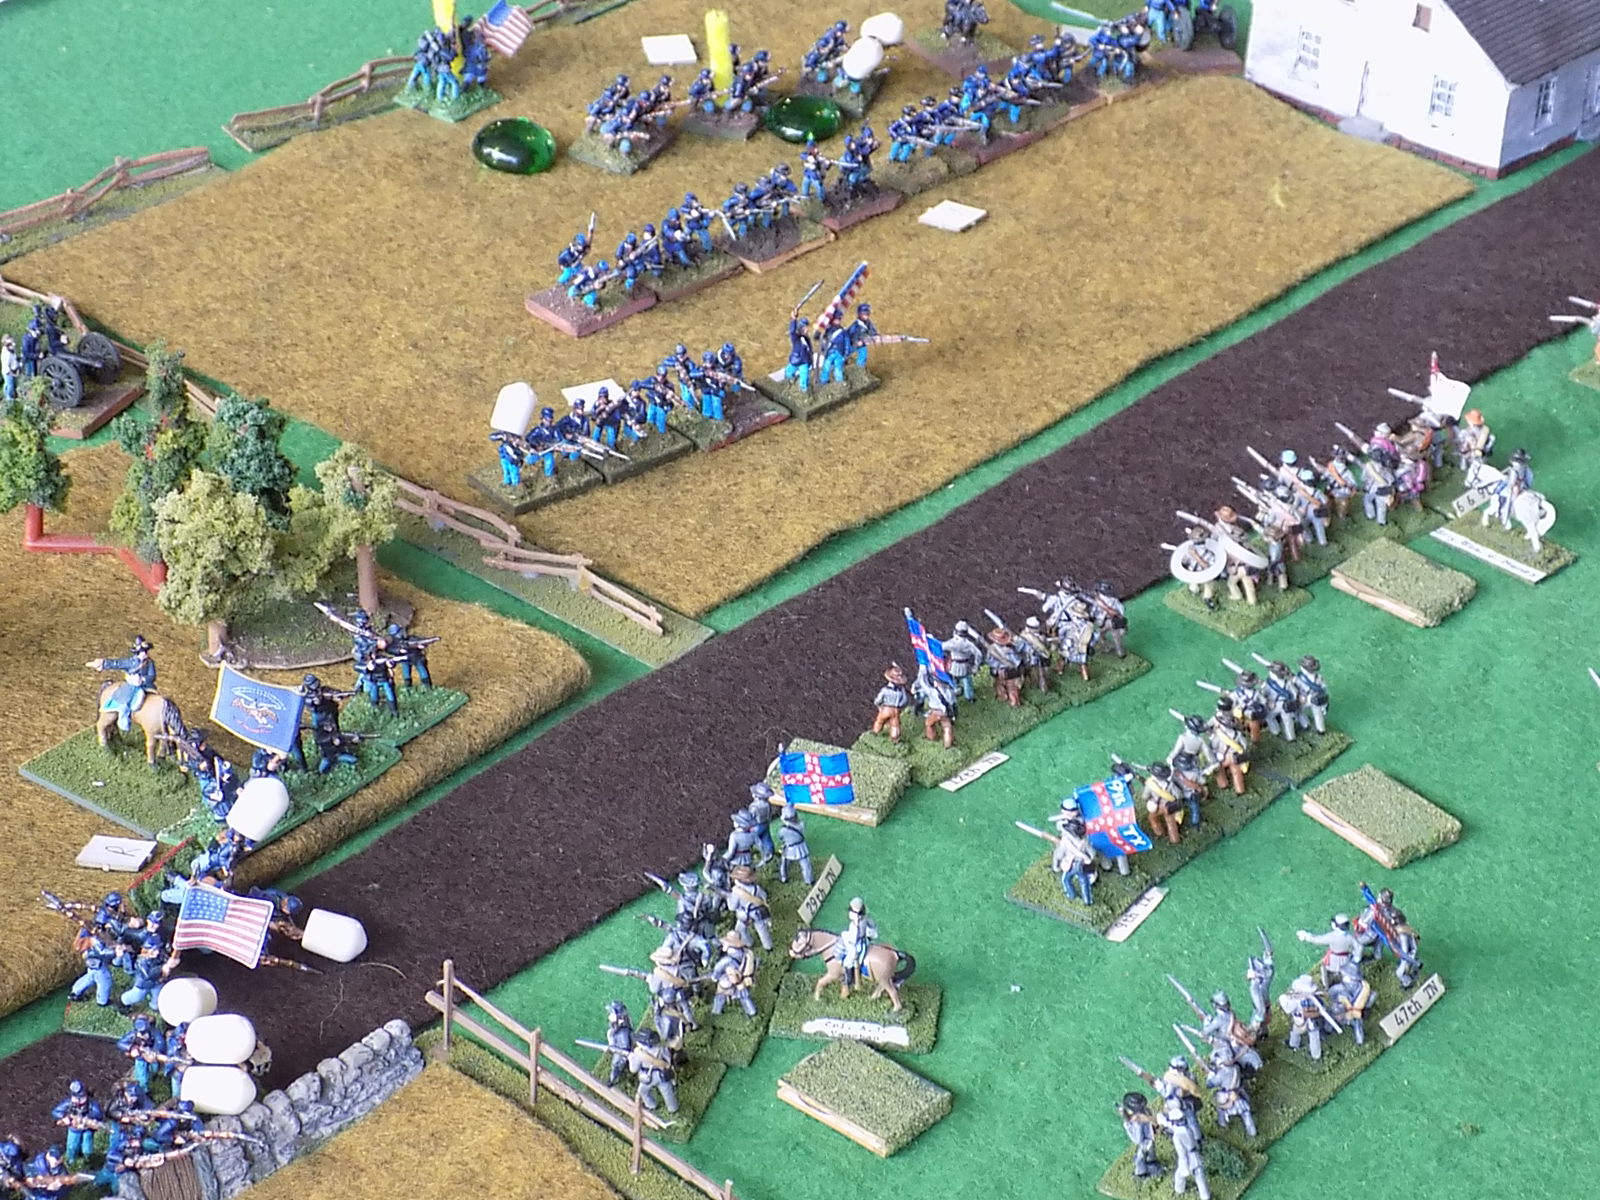
Lines form a Table A with my command grabbing a key stone wall.
|
 |
Table B - neither side wasted any time making it bloody.
|
 |
The Reb cavalry heads for the other table as reserves move forward.
|
 |
Yankee cavalry looks to flank the Reb line on Table A.
|
 |
The Yankees pile up against the Reb right, both sides move on the center.
|
 |
The Reb cavalry arrives on Table A.
|
 |
A lot of aggression from both sides on our right. Also lots of bad dice.
|
 |
Reb cavalry reorganizes and moves to meet their foes.
|
 |
Hammer and tongs on Table A as Yankees take ground on our right.
|
 |
| Draw sabres, prepare to charge! |
 |
| Yankees are getting whittled down on Table A in the center. |
 |
Broad view of Table A.
|
 |
The cavalry crash together on Table B, result is melee!
|
 |
Meanwhile, elsewhere on Table B it is looking promising.
|
 |
The cavalry melee went incredibly well for the Confederates.
|
 |
| Once they reorganize the Yankee line looks in perilous shape. |
 |
The Rebel right has been mangled but holds against superior numbers.
|
In the center of Table A, I had weakened the Yankees, moved up fresh troops and was prepared to charge with support and rupture their position. All that had to happen was get past First Fires. A hit, no problem, just test for first casualty.... snake eyes! Rout! Test the next unit for seeing a rout... snake eyes! Rout! Test the next... yep, snake eyes. Six 1s in a row on d6 tosses. Let us just say that the air sizzled for a time. <grin>
 |
| View of the table after the dice disaster. |
 |
The dice were also unkind to the Yankees on the far left.
|
 |
| A decisive moment on Table B. |
The game was called/conceded at this point. As is so often the case, on Table A we thought the battle lost. Although the loaded Confederate left/center was making real progress and still threatened a breakthrough, the Rebel right had been mangled severely. But when victory points for holding terrain points and for eliminating enemy units were totalled, it was determined that thanks largely to Table B the Confederates had won handily.
That was back in August and happily there were no ill-effects from gathering for the day. My thanks to the seven players who battled all day and especially to Ian McCurdy for doing the prep and planning.


Very nice. Been awhile since I have had a chance to play some miniatures.
ReplyDeleteWow! What a battle. Thanks as always for the pictures and captions detailing what transpired!
ReplyDelete