Sunday, December 25, 2022

Battle of Hinten-Anzhen-Dingle (Imagi-Nations)

In our Imagi-Nation world, the combined armies of Odessenau and Latveria have invaded Vaneria and are moving on a strategically located city along a critical river.  Vaneria was a Russian position that was taken by the Ottomans and has reached semi-independent status over the decades of benevolent rule.  On each flank are smaller forces to protect the besiegers from relief efforts.  Looking to back a winner, Prochistan has joined the invaders, looking for rewards at the end of the campaign.  Similarly, Austria not wanting to see a stronger Odessenau, has taken their own interests at heart and have sent an expeditionary force to help maintain  the power balance.

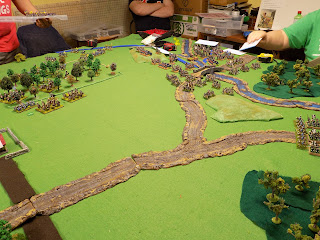
Near the picturesque village of Hinten-Anzehn-Dingle the opposing forces find each other.  Rules are Batailles de l'Ancien Regime (BAR) by Bill Protz.  Figure ratio is 10:1 and the order of movement and firing is determined by cards.  In our case today, by Brigade.

The village of Hinten-Anzehn-Dingle knows nothing of 
the coming storm.

Batailles de l'Ancien Regime as noted above.

Closer view of town. Mostly paper models with some 3D printed.

The townsfolk rejoice at the sight of Vanerian troops.

A delegation turns out to welcome them.

The initial set on.  More are on the back tables.

Meanwhile, the sinister forces of Odessenau
and Prochistan approach, leading a flank force.

The stream is but a minor hinderance to movement.

On the left, Austrian allies enjoy the morning sun.

Soon each side has eight infantry regiments of 60 figures
and eight cavalry squadrons of 12 figures each, in play.

The more open ground on the defenders left seems to
favor cavalry the best.

Some squadrons drift into musket range, to their demise.

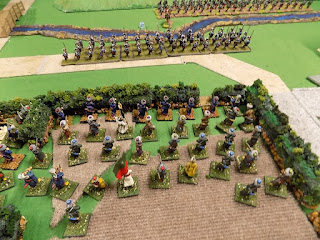
A Vanerian light regiment shelters behind a bocage-like
hedge, getting serious cover.

The Prochistan forces are very aggressive and attack
the bocage and their cavalry charges steady infantry.

The invaders are eagerly attacking with their cavalry,
the Austrians and Vanerians have theirs supporting.

The feared winged hussars of Prochistan and Odessenau
infantry take hurts, but slowly push back the Vanerians onto
their supports, the white cloaked grenadiers.

The Vanerian lights are repeatedly charged by Prochistan
infantry but manage to hold off assaults through their 
heavy cover.

Similarly, the Prochistans are assaulting the village in
bitter, house to house fighting, leaving disordered mobs
to move from building to building.

On the defender's left, a big cavalry scrum erupts between
the Austrians and the weakened Odessenau cavalry.

The winged hussars destroy themselves trying to break
the Vanerians, who somehow hold.  For now.

The Austrian infantry begins to sort itself out and move
forward with hostile intent.

On the defender's right, the Tatars move to strike the
disordered invaders.

The other Vanerian cavalry moves to the left to support
the advancing Austrians.  Along the way they eliminate
some previously victorious Odessenau cavalry.

Odessenau resorts to desperate tactics, firing through
their own battery at the advancing Austrians, eliminating it.

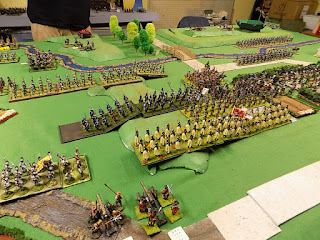
The action filled center.  Invaders on the right, some 
infantry reordering.  Note: for our game the light infantry
was not allowed to take the close order.

Loudon's "Green Grenadiers" (just line) advance to 
complete the discomfort of the Odessenau line.

To try to stave off disaster, the (real) Austrian grenadiers
are charged by dragoons and infantry.  All to no avail.

Prochistan is finally successful driving the Vanaerian 
lights off the bocage.  If caught in the open, they will be
eliminated without a fight.

The dragoon remnants are thrown back but somehow
pass morale.

The defenders are now fully the attackers on their left,
with the Austrian hussars, previously held back, moving
to mop up. 

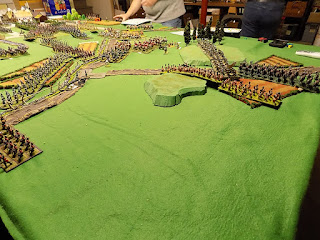
A final long view of the table from the Austrian end.

With half their infantry routed or about to and their cavalry neutralized, the invaders turn tail and depart with all due haste.  Only the Austrian hussars are in position to pursue and the firepower still remaining will make it a half-hearted pursuit at best.

This battle may possibly influence events in and around the siege.  Strategic decisions and variable die rolls will determine for sure.  Thanks to all for the good natured enjoyment.  We shared a group light meal and snacks, along with some gourmet brownies.


Sunday, August 7, 2022

Medlinburg River Crossing - Empire Napoleonics

Our imbalanced scenario today sees a reinforced French rear-guard corps attempting to escape encirclement by the allied armies.  The game is loosely based on the events at Leipzig in 1813 and the subsequent retreat.  As such, II Corps and attachments must cross two rivers and pass over the 11.5' table.  The French and Swiss under Marshal Oudinot will be opposed by Prussians, Austrians, Swedes and Russians.  The scenario, originally published in Wargames Digest allows each side to field a corps from 1809-1813.  Some house rules were in effect but essentially it was Empire (V) at it's best.

This is a long report with lots of pictures.  Click on the images to enlarge them  Comments welcomed.

After the first "Grand Tactical" move, the French have all their cavalry leading, looking towards the distant bridge.

Which is guarded by a Young Guard brigade, Old Guard heavy battery, and two excellent cavalry regiments.  A walled Benedictine monestary sits on one flank.  Both rivers cannot be forded, though the main body has a pontoon train with two bridges loaded.

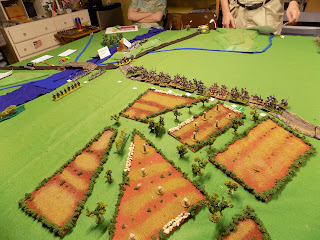
Utilizing the road bonus, the French cavalry races for sanctuary past the autumn fields and the far bank.  But the Coalition forces have not been idle.

The Swedish contingent emerges through the orchard on the French right as a pontoon bridge goes up, and a Prussian brigade appears on their left.  Maybe that cavalry will be needed?

A small Russian corps (aren't they all?) arrives in the middle of the table, ready to fight.  With everyone.  The Russian commander had to be repeatedly reminded that the Prussians were on his side.  Today.

A Prussian infantry brigade/division rumbles into action, unable to fully clear the bridge initially.

The Swiss "Red" division moves to engage the Swedes while a French division fans out and the Swedes take the middle ground opposing them all.  The French cavalry is recalled.

But the Russians cut them off and engage them all along their line, even siezing a walled farm complex that was unattended.

In the following hour the Austians belatedly arrive to attempt to cut off the retreat.  The French Guard elements take up position to contest the attack.

Charge after charge are resolved in the center with honors even.  Though some of the results are decidedly unexpected.  The French cavalry will not be riding to the rescue though.

The Prussian brigade finally clears the bridge and starts to advance.  The French, perhaps not appreciating the gravity of the situation adopt a defensive posture rather than trying to brush aside the Prussian line and Landwehr.

The massive cavalry scrum continues in the center with the French slowly yielding some ground.

The Austrians prepare an enormous wave assault in column against the Guards holding the area around the monestory.  

The French, satisfied with their formations, beginning to push out from the bridgehead, though Swedish lines and Prussian columns with artillery support await.  Time is not on the side of the French.

The clear understanding was that any French forces that did not exit the table would be considered captured or eliminated, so it was critical for them to open an escape path early.

The Swedish and Russian cavalry begin to converge on the crossroads and make it even more unlikely that the cavalry will link up with the main body again.

A third Prussian brigade comes on table, rich with cavalry and a grenadier brigade.  The jaws of the trap are fully beginning to close.  Back at the orchard, the Swiss are mangling the Swedish infantry, but it won't matter if the road is closed.

Looking at a bigger picture, the French are jammed up at the original bridge and cannot even deploy their superior infantry against the blockaders.

Incredibly, with a small percentile chance, the Austrian waves roll over the defenders and evict the French Guard from the monestary.  The bridge across the Medlinburg River starts to get congested and the French cavalry is starting to find the far bank appealing.

The "Swiss", shown here with Danish proxies, are on a roll, but will it matter?

The French infantry has hardly advanced, which is not really surprising.  With the huge number of cavalry charges to resolve we didn't get in many hourly rounds of play in the many hours we were together.

The French cavalry, seeing no way of joining up with II Corps, made to exit the field of play.  The Austrians were undoubtedly going to cut the bridge once the cavalry was gone and the Russians would set up another layer to trap the French against the main army abstractly pursuing.

This is the third time for this scenario.  In the first the French, with a lot of luck, won a major victory.  In the second, passive allied players made it an easy win for the French.  This time, by not using their excellent cavalry to keep a corridor open, the French were cut off and all the infantry bagged.  Finally, despite mentioning it in the briefing, no call for reinforcements was made.  So the Vistula Legion infantry and uhlans never came to help hold the Medinburg bridge open.

Still, lots of drama on the tabletop and the tabletop debut of the Prussian, Swedish and Danish (Swiss proxy) contingents with the main gaming group.  Thanks for reading it to the end.