Wednesday, June 29, 2016

Debacle at El Ka-Bong

December, 1940 and Operation Compass is beginning with the reduction of the Italian frontier forts.  Special rules taken from Burning Empires, played on a 6x6' surface since we upped the points to 2000.  This would have unexpected consequences given the mission rules.  But on to the game.  Click on the pictures to big-up.

Only two platoons are allowed to start the game inside or within 4" of the fort.  The attacker starts with his entire force, no closer than 12".  The defender gets to begin bringing in relief column on their turn one with a d6 dice roll.  1-4 indicates a specific corner, a 5-6 and you get to pick.

The British surround the fort and surprisingly have no armour.
Things seemed to start really well for the British.  Two of three stands facing them are eliminated and the Confident/Trained platoon (our best) was pinned.  The Reluctant/Trained facing a stronger infantry force only took one loss and was also pinned by hits. 

Bottom of one and two platoons of M13/40 "tanks" roll on.
In order to get past 1350 points for the Italians (and the fort is worth 300) I added these two platoons even though they aren't on the list.  Turns out it may be a weakly armored and slow tank, but the M13/40 sports a lot of MGs.

On the other corner the tanks largely eliminate the British mortars
and Vickers.
Top of two and the British can assault.  Both platoons on the gate side recover and move in.  Defensive fire is weak and it is "over the top" to assault.

One platoon ends up on top, the other blasts open the gate.

The M13s rumble forward, eliminating 25pdrs and pinning one
platoon.

On the other side Sahariana cars add to the firepower woes of
the Commonwealth forces.  Artillery unlimbers on the other end.
In a scene reminiscent of the movie "Glory" where the Union forces are over the walls and racing for the interior, only to find cannons and rallied troops, the machinegun heavy Italians rally and turn on the invading platoons.  Few stands are eliminated, but both are pinned between the tanks and fort defender's fire.

Tanks closing, but it is the rally rolls that matter.
So in the top of turn 3 all three British infantry platoons fail to rally from pinned status.  Given that the Italian armor will ravage them in the bottom of three the British concede the game. 

Even our traditional game winners suffered.  This one taken out
by MG fire.
Given that we could automatically bring on parts of the relief column on turn one, even though we were starting farther away than normal on our over-large table, it was a game-breaker to allow tanks.  Sahariana cars, the normal mobile element, has a lot of firepower too, but not as much as the tanks.  The Libyan Mitraglieri platoons are weak, but with four infantry and three HMGs each they can roll a lot of dice for a measly 115 points.

Despite the disaster the historic clock will continue to tick and our next FoW game will be around February, 1941.  But first, a little horse and musket distraction.
 

Wednesday, June 22, 2016

Disaster at Yabbi-Dabbi-Doo

With historic reenacting disrupting my weekend schedule a few of us hit upon the idea of starting a "Monday Night Fights."  Having taken a hiatus from Flames of War for almost a year we opted for an early-war loosely structured campaign in North Africa starting with the massive Italian invasion of Egypt in September, 1940.  The mission is a fighting withdrawal and by buying every legal resource I own we got to 1955 points for the four players.

Normally our group is very conscious of bunching up, the dreaded "parking lots" of song and legend, but knowing that I automatically got the first move it allowed from some liberties.  Unfortunately I couldn't scatter out as much as I wanted.
Starting positions, with a platoon of Vicker MGs held in ambush.

We have tanks, mortars, heavy and medium artillery and the air force.

Luckily for us the first 25pdr. barrage managed to not land.  But the presence of two Matildas (can't kill them) and the Vickers who eliminated my ATG platoon in one turn spell ill fortune. 
The burning vehicles are appropriately flame-thrower tankettes.

The table really is two-toned brown, just looks pale in the light.  We push forward quickly.

In the four turns played the sporadic air support showed up every turn and three out of four times got three aircraft.  However, the only hit scored was on the last turn.
I love these old birds.  Historically speaking, not the model.

Seeing that even direct fire from the 100mm guns couldn't pierce a Matilda's armor I rushed the entrenched British infantry before they could redeploy and finish off the Italian armor.  Already one platoon had disappeared.
The moment of glory for the Carri.  Successful assault and
destruction of three British infantry stands.

Despite pinning the British on our left, the Italian infantry was chewed up and prospects were dim.  The Matildas were already having an effect and the British had none vital platoons to pull off per the mission.  So on turn four I gambled all for the win.  Three CR-42 Falcos swept in and scored their one hit of the night.  But missed the Matilda.  Sigh.  My tanks assaulted the 25pdrs. but despite being pinned they destroyed one M13/40 and another bailed to stop the assault. 

And so I peevishly conceded the game to the victorious Commonwealth players.  They had good dice when they really needed it and we did not.  Our artillery was particularly ineffective and when dealing with dug in infantry it must do its job.

The next game will roll the clock forward a few months and will hopefully offer a unique opportunity.  Eventually the Afrika Korps will arrive.
 

Monday, June 6, 2016

Marengo

Seven players played an Empire game loosely based on the Battle of Marengo in 1800.  Austrian General Melas (poor, uninspiring) has decided to seize the initiative from General Bonaparte (superior, charismatic) by launching a dawn attack on the scattered Republican forces.

In Empire the maneuver elements (MEs) are given an operational order which may or may not be changed by a percentile roll based on the commanders rating.  For our game the Austrians were allowed to use a x1.5 modifier throughout since the attack was well planned and understood.


The Austrians were allowed to place one ME across the Bormida River in the pre-dawn hours and one each "hourly round" thereafter at quarter grand tactical speed.  At both the pontoon bridge and regular bridge the Austrians chose cavalry ME or "Mixed" MEs to find and fix the French in position.  An infantry ME was scheduled to follow across the pontoon bridge.


The French have one infantry ME in the vicinity of each of the two villages with the cavalry in the center.  All are operating under a "Rest and Rally" order to reflect their unpreparedness at first light.


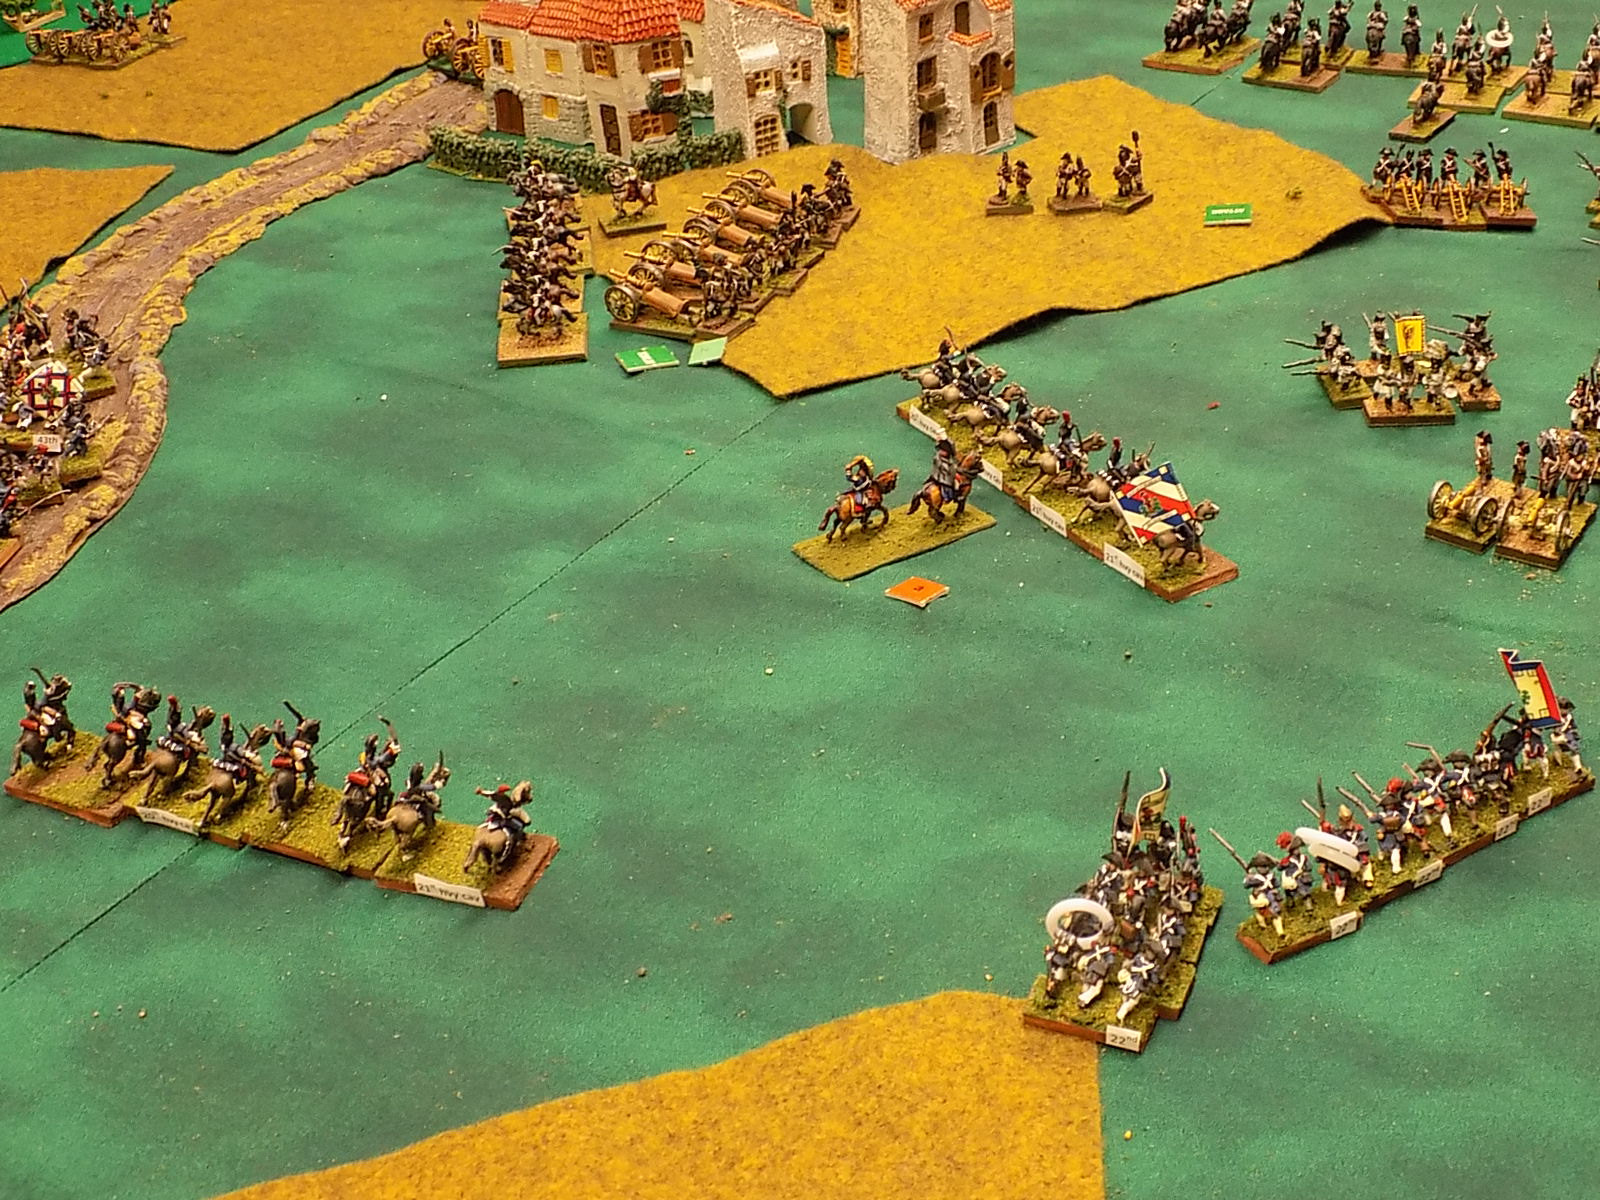
The mixed ME boldly plunged forward, engaging almost the entire French army on table.  Looking back over their shoulders they were dismayed to see that the supporting infantry column was still on the wrong side of the river, having failed their 78% chance of activation.


Elsewhere the Austrians elected to send all cavalry forward, meaning it would be a long time before any infantry entered the fray. 


The main combat developed in the center as the mixed ME hung in there, repeatedly beating the odds to repulse French attacks or maneuvers.  Although they would be destroyed in time, they allowed the tardy follow-up forces to get into position. 


With even the Counselor Guard committed and a reinforcing French ME arriving statistically early, the fray remained close.  Slowly the advantage shifted to the French and the absence of additional infantry support limited their options.


Even Bonaparte can miss a command roll once in a while.  The reinforcing French ME failed to change their maneuver orders and never became engaged in our battle.


Having levered an opening, the French cavalry became active, striking at  the flank of an Austrian cavalry ME and routing it.  Tragically for the valiant Austrians, they failed yet another activation roll and left their next infantry ME on the wrong side of the river.


The quality edge enjoyed by the French begins to take hold and in a one-on-one fight are generally successful everywhere.  The Austrian position is shakey and no additional supports are readily available.


After playing four hourly rounds in four hours we needed to stop the carnage.  The Austrians had so consistently failed their activation rolls that there was no chance of bringing their superior numbers to bear to counter the French quality edge. 

Although I may have erred in only allowing one cavalry ME to cross per hour the dice rolls are really what doomed the Austrians.  The game featured a fluidity we don't see that often with lots of grand tactical movement.  Thanks to the Austrian team of Bob, Dan, Dennis and Jay; as well as the French trio of Eric, Todd and myself (the lost ME commander).